Hey Guys,
Its been a while since my last post, apologies for the same. I have been trying to do too many things at the same time :P
While doing some extensive research on Siebel's f9 send email functionality, I came across this cool feature.
So if your business uses a common template to send out to its contacts from a specific applet, this feature could prove useful to you - saves you the effort of manually selecting the template.
Here is how you can add a Default Email Template to your applet.
Step 1: Query for the desired applet you want to set up the email template for.
Step 2: Goto View > Windows > Properties Window.
NOTE: If you are using Siebel versions prior to 8.x. You do not have to open the applet properties window. You should see it as part of the properties for the applet in OBLE.
Step 3: In the Mail Template property enter the Email template name exactly the way it appears in the Siebel Client.
Step 4: Compile and test - Now when you are on the just modified applet and hit F9, you should see the template pre-populated in the template selection dialog.
Note: Setting a default template for the Send Email command, as described above, overrides template visibility by channel. For example, if a template is specified as the default email template for Change Request applets, this same template will also be the default template for these applets for the fax channels (using the Send Fax command).
Cheers!
Tuesday, January 18, 2011
Friday, October 29, 2010
Skype - Siebel Custom Integration
Want to call one of your contacts/prospects in Siebel without a lot of manual effort? now you can...
Here are a few simple steps of how you could integrate Skype with your siebel application.
Thank you Bernard for sharing this!
Configuration Steps - (for this example I am going to use the contacts applet)
Step 1: Create a custom Business service called 'OS Skype Integration' and assign it to a locked project.
place the below code in the PreCanInvokeMethod event of the Business Service
function Service_PreCanInvokeMethod (MethodName, &CanInvoke)
{
if(MethodName == "GetField")
{
CanInvoke="TRUE";
return(CancelOperation);
}
else if(MethodName == "TransformToSkype")
{
CanInvoke="TRUE";
return(CancelOperation);
}
else
{
return(ContinueOperation);
}
}
place the below code in the PreInvokeMethod event of the Business Service
Create two new functions as below -
GetField: This method as you can see will get the properties set by the Browser script in the Contact List Applet and will make them available in the Input Property Set of the Business Service.
function GetField(Inputs, Outputs)
{
var sfield = Inputs.GetProperty("fieldname");
var sId = Inputs.GetProperty("Id");
var boName = Inputs.GetProperty("boName");
var bcName = Inputs.GetProperty("bcName");
var bo = TheApplication().GetBusObject(boName);
var bc = bo.GetBusComp(bcName);
bc.ClearToQuery();
bc.SetViewMode(AllView);
bc.ActivateField(sfield);
bc.SetSearchSpec("Id", sId);
bc.ExecuteQuery(ForwardOnly);
if (bc.FirstRecord())
{
var svalue = bc.GetFieldValue(sfield);
Outputs.SetProperty("fieldvalue",svalue);
}
else
{
Outputs.SetProperty("fieldvalue","");
}
}
TransformToSkype: This method contains the main string used to make the call. The string includes the Skype exe path and teh Phone Number of the call recipient/Siebel Contact.
So, the string being passed would look something like this "C:\Progra~1\Skype\Phone\skype" /callto:+14152065351. This string is passed to the browser script for execution.
NOTE 1: The target customer base for the Client where I implemented this was for US only, thats why the '+1'. If you wish to make it more general you could check the Country of the contact and derive the country code based on that.
NOTE 2: You could also simply use 'callto:+14152065351' in the below script skiping an extra step(Step2 - Creating the LOV) - Thanks Ranjith for pointing that out.
function TransformToSkype(Inputs, Outputs)
{
var sWorkphone = Inputs.GetProperty("PhoneNum");
var sFirst = sWorkphone.charAt(0);
var sSkypeNum="";
var sLOVText = TheApplication().InvokeMethod("LookupValue","OS_SKYPE_PATH","Path");
if(sFirst!="+")
{
sSkypeNum = "\"" + sLOVText + "\"" + " /callto:+1" + sWorkphone;
}
else
{
var sLast = "\n"
var sSubstr = Clib.strstr(sWorkphone, sLast);
var sRtn = sWorkphone.replace(sSubstr, "");
//sSkypeNum = "skype:" + sRtn + "?Call";
sSkypeNum = "\"" + sLOVText + "\"" + " /callto:" + sRtn;
}
Outputs.SetProperty("SkypeNum",sSkypeNum);
}
Step2: Create an LOV as seen in the below screenshot - This would contain the .exe path of Skype.
Step 3: Lock the 'Contact List Applet' and create three custom buttons as shown in the screenshot.(Note: The 'InvokeMethod property for the Skype buttons should be same as the ones in the script')
Make sure the buttons are clickable by using the CanInvokeMethod Applet User property.
You could also get more creative and use a 'Skype Toolbar' in Siebel. Like I have and call the business service from the Command Invoked. The Script would change in that case.(The Browser script from the applet would then be required on the Business Service)
Step 4: Place the below script in the browser script evet Applet_PreInvokeMethod of the contact list applet.
code:
function Applet_PreInvokeMethod (name, inputPropSet)
{
if(name=="Skype" || name=="SkypeCell" || name=="SkypeHome")
{
try
{
var serv = theApplication().GetService("OS Skype Integration");
var inp = theApplication().NewPropertySet();
var outs = theApplication().NewPropertySet();
inp.SetProperty("Id", this.BusComp().GetFieldValue("Id"));
switch(name)
{
case "Skype":
inp.SetProperty("fieldname","Work Phone #");
break;
case "SkypeCell":
inp.SetProperty("fieldname","Cellular Phone #");
break;
case "SkypeHome":
inp.SetProperty("fieldname","Home Phone #");
break;
}
inp.SetProperty("boName", this.BusObject().Name());
inp.SetProperty("bcName", this.BusComp().Name());
outs = serv.InvokeMethod("GetField",inp);
var svalue = outs.GetProperty("fieldvalue");
inp = null;
inp = theApplication().NewPropertySet();
inp.SetProperty("PhoneNum",svalue);
outs = null;
outs = theApplication().NewPropertySet();
outs = serv.InvokeMethod("TransformToSkype",inp);
svalue="";
svalue = outs.GetProperty("SkypeNum");
//calls the ActiveXObject and passes the Skype exe path allong with the phone number of the contact
var wsh = new ActiveXObject("WScript.Shell");
var oExec = wsh.Exec(svalue);
wsh=null;
return ("CancelOperation");
}
catch(e)
{
alert ("Error Applet_PreInvokeMethod : " + e.toString());
}
finally
{
inp=null;
outs=null;
serv=null;
}
}
return ("ContinueOperation");
}
This script will call the 'OS Skype Integration' and pass the respective Phone numbers for transformation if required.
Step 5: Since we are invoking the Business service from the browser level. The Business service will have to be registered as a client business sevice in the Application User Props
Step 6: Compile all objects you modified.
Step 7: Compile the browser scripts by using Genb or should I say UltraGenB(A cool new utility created by Jason Le of Impossible Siebel)
Query on any contact in the Contact List Applet and hit one of the buttons....and there you have it...TRING TRING!!!

Happy Calling!!
Here are a few simple steps of how you could integrate Skype with your siebel application.
Thank you Bernard for sharing this!
Configuration Steps - (for this example I am going to use the contacts applet)
Step 1: Create a custom Business service called 'OS Skype Integration' and assign it to a locked project.
place the below code in the PreCanInvokeMethod event of the Business Service
function Service_PreCanInvokeMethod (MethodName, &CanInvoke)
{
if(MethodName == "GetField")
{
CanInvoke="TRUE";
return(CancelOperation);
}
else if(MethodName == "TransformToSkype")
{
CanInvoke="TRUE";
return(CancelOperation);
}
else
{
return(ContinueOperation);
}
}
place the below code in the PreInvokeMethod event of the Business Service
function Service_PreInvokeMethod (MethodName, Inputs, Outputs)
{
try
{
switch (MethodName)
{
case "GetField":
this.GetField(Inputs, Outputs);
return (CancelOperation);
case "TransformToSkype":
this.TransformToSkype(Inputs, Outputs);
return (CancelOperation);
default:
return (ContinueOperation);
}
}
catch(e)
{
TheApplication().RaiseErrorText(e.toString());
}
finally
{
}
}
Now that the two methods are defined and ready for use, lets define the logic inside them{
try
{
switch (MethodName)
{
case "GetField":
this.GetField(Inputs, Outputs);
return (CancelOperation);
case "TransformToSkype":
this.TransformToSkype(Inputs, Outputs);
return (CancelOperation);
default:
return (ContinueOperation);
}
}
catch(e)
{
TheApplication().RaiseErrorText(e.toString());
}
finally
{
}
}
Create two new functions as below -
GetField: This method as you can see will get the properties set by the Browser script in the Contact List Applet and will make them available in the Input Property Set of the Business Service.
function GetField(Inputs, Outputs)
{
var sfield = Inputs.GetProperty("fieldname");
var sId = Inputs.GetProperty("Id");
var boName = Inputs.GetProperty("boName");
var bcName = Inputs.GetProperty("bcName");
var bo = TheApplication().GetBusObject(boName);
var bc = bo.GetBusComp(bcName);
bc.ClearToQuery();
bc.SetViewMode(AllView);
bc.ActivateField(sfield);
bc.SetSearchSpec("Id", sId);
bc.ExecuteQuery(ForwardOnly);
if (bc.FirstRecord())
{
var svalue = bc.GetFieldValue(sfield);
Outputs.SetProperty("fieldvalue",svalue);
}
else
{
Outputs.SetProperty("fieldvalue","");
}
}
TransformToSkype: This method contains the main string used to make the call. The string includes the Skype exe path and teh Phone Number of the call recipient/Siebel Contact.
So, the string being passed would look something like this "C:\Progra~1\Skype\Phone\skype" /callto:+14152065351. This string is passed to the browser script for execution.
NOTE 1: The target customer base for the Client where I implemented this was for US only, thats why the '+1'. If you wish to make it more general you could check the Country of the contact and derive the country code based on that.
NOTE 2: You could also simply use 'callto:+14152065351' in the below script skiping an extra step(Step2 - Creating the LOV) - Thanks Ranjith for pointing that out.
function TransformToSkype(Inputs, Outputs)
{
var sWorkphone = Inputs.GetProperty("PhoneNum");
var sFirst = sWorkphone.charAt(0);
var sSkypeNum="";
var sLOVText = TheApplication().InvokeMethod("LookupValue","OS_SKYPE_PATH","Path");
if(sFirst!="+")
{
sSkypeNum = "\"" + sLOVText + "\"" + " /callto:+1" + sWorkphone;
}
else
{
var sLast = "\n"
var sSubstr = Clib.strstr(sWorkphone, sLast);
var sRtn = sWorkphone.replace(sSubstr, "");
//sSkypeNum = "skype:" + sRtn + "?Call";
sSkypeNum = "\"" + sLOVText + "\"" + " /callto:" + sRtn;
}
Outputs.SetProperty("SkypeNum",sSkypeNum);
}
Step2: Create an LOV as seen in the below screenshot - This would contain the .exe path of Skype.
Step 3: Lock the 'Contact List Applet' and create three custom buttons as shown in the screenshot.(Note: The 'InvokeMethod property for the Skype buttons should be same as the ones in the script')
Make sure the buttons are clickable by using the CanInvokeMethod Applet User property.
You could also get more creative and use a 'Skype Toolbar' in Siebel. Like I have and call the business service from the Command Invoked. The Script would change in that case.(The Browser script from the applet would then be required on the Business Service)
Step 4: Place the below script in the browser script evet Applet_PreInvokeMethod of the contact list applet.
code:
function Applet_PreInvokeMethod (name, inputPropSet)
{
if(name=="Skype" || name=="SkypeCell" || name=="SkypeHome")
{
try
{
var serv = theApplication().GetService("OS Skype Integration");
var inp = theApplication().NewPropertySet();
var outs = theApplication().NewPropertySet();
inp.SetProperty("Id", this.BusComp().GetFieldValue("Id"));
switch(name)
{
case "Skype":
inp.SetProperty("fieldname","Work Phone #");
break;
case "SkypeCell":
inp.SetProperty("fieldname","Cellular Phone #");
break;
case "SkypeHome":
inp.SetProperty("fieldname","Home Phone #");
break;
}
inp.SetProperty("boName", this.BusObject().Name());
inp.SetProperty("bcName", this.BusComp().Name());
outs = serv.InvokeMethod("GetField",inp);
var svalue = outs.GetProperty("fieldvalue");
inp = null;
inp = theApplication().NewPropertySet();
inp.SetProperty("PhoneNum",svalue);
outs = null;
outs = theApplication().NewPropertySet();
outs = serv.InvokeMethod("TransformToSkype",inp);
svalue="";
svalue = outs.GetProperty("SkypeNum");
//calls the ActiveXObject and passes the Skype exe path allong with the phone number of the contact
var wsh = new ActiveXObject("WScript.Shell");
var oExec = wsh.Exec(svalue);
wsh=null;
return ("CancelOperation");
}
catch(e)
{
alert ("Error Applet_PreInvokeMethod : " + e.toString());
}
finally
{
inp=null;
outs=null;
serv=null;
}
}
return ("ContinueOperation");
}
This script will call the 'OS Skype Integration' and pass the respective Phone numbers for transformation if required.
Step 5: Since we are invoking the Business service from the browser level. The Business service will have to be registered as a client business sevice in the Application User Props
Step 6: Compile all objects you modified.
Step 7: Compile the browser scripts by using Genb or should I say UltraGenB(A cool new utility created by Jason Le of Impossible Siebel)
Query on any contact in the Contact List Applet and hit one of the buttons....and there you have it...TRING TRING!!!
Happy Calling!!
Sunday, September 19, 2010
Launching iHelp with eScript
Hey Folks,
I had a requirement with one of my clients to have a button on a Form Applet that opens the iHelp.
"My Oracle Support" has a few SR's that are related, and I had tried various things including trapping the method calls that are triggered when clicking on the iHelp button on the Toolbar, then repeating them on my custom button but with no luck.
Oracle support seems to confirm you can't Launch iHelp with Script in Siebel 7.7, but doesn't mention Siebel 8.1 (which probably means you can't do it!)
This however is possible through script. You could use the below code on the button to toggle the iHelp from a custom button.
"My Oracle Support" has a few SR's that are related, and I had tried various things including trapping the method calls that are triggered when clicking on the iHelp button on the Toolbar, then repeating them on my custom button but with no luck.
Oracle support seems to confirm you can't Launch iHelp with Script in Siebel 7.7, but doesn't mention Siebel 8.1 (which probably means you can't do it!)
This however is possible through script. You could use the below code on the button to toggle the iHelp from a custom button.
Code:
function WebApplet_PreInvokeMethod (MethodName)
{
{
if(MethodName == "LaunchiHelp")
{
var oBS= TheApplication().GetService("Task Assistant UI Service");
var psInputs = TheApplication().NewPropertySet();
var psOutputs = TheApplication().NewPropertySet();
oBS.InvokeMethod("ToggleiHelp", psInputs,psOutputs);
return (CancelOperation);
}
}
{
var oBS= TheApplication().GetService("Task Assistant UI Service");
var psInputs = TheApplication().NewPropertySet();
var psOutputs = TheApplication().NewPropertySet();
oBS.InvokeMethod("ToggleiHelp", psInputs,psOutputs);
return (CancelOperation);
}
}
Your custom button should now function exactly like the iHelp launch button on the toolbar.
Update (thanks to my colleague for sharing this)
I have had to add an update to the code so that it looks like this:
Without this parameter there are issues with opening / closing iHelp multiple time from different entities. It results in a Siebel crash and you have to log in again. With the command property it appears to work fine.
Just a word of caution: this command number is likely to be different in different version of Siebel. It is 8.1.1.2 SIA [21215] ENU that I have this working for.
var psInputs = TheApplication().NewPropertySet();
var psOutputs = TheApplication().NewPropertySet();
psInputs.SetProperty("Command", "#14");
var oBS = TheApplication().GetService("Task Assistant UI Service");
oBS.InvokeMethod("ToggleiHelp", psInputs, psOutputs);
Without this parameter there are issues with opening / closing iHelp multiple time from different entities. It results in a Siebel crash and you have to log in again. With the command property it appears to work fine.
Just a word of caution: this command number is likely to be different in different version of Siebel. It is 8.1.1.2 SIA [21215] ENU that I have this working for.
Cheers!
Friday, August 6, 2010
Get NASDAQ Market updates in Siebel
Like most of you Siebel lovers I too like to integrate anything and everything with Siebel. Here is an example of how you can get NASDAQ updates within your Siebel Application.
Here is how you do it!
Steps:
1. Create an applet with a Single control.
2. Add the following code to your single control that you have in your applet.
Caption String Override: (in frame src tags) ="tickerpanel.asp?COOKIE=S~MSFT~~|S~INTC~~|S~NWSA~~|S~QQQQ~~|S~CSCO~~|
S~ATML~~|S~DELL~~|S~NVDA~~|S~RIMM~~|S~MU~~|I~IXIC|I~INDU|I~SPX" name="ticker" scrolling="no" frameborder=0 noresize marginwidth="0" marginheight="0"
3. place this applet in a view and your done!
Stay tuned for a more advanced version of this post!
Cheers!
Thursday, July 8, 2010
Create an HTML email in Oracle CRM On Demand
For any business, It's very important to keep your customers happy at all times.You need to constantly keep them updated on how their service requests are being processes. Below is one such example
I recently came across a requirement in which my client wanted to have some functionality in which, when a new SR is created, a Service Representative should be able to generate a neatly formatted email with all the required information and send it across to a Customer, so they know that the SR is being looked into, something like a SR Acknowledgment.
Here's what I did for them!
Solution:
Step 1: Build the Report
Create a Narrative Report that will contain all the required fields that is required to send out an email.
In Step 2 on the reports wizard add only a Narrative View
Save the report
Step 2: Create a Weblink and add to the Layout
Create a Weblink field in the Service Request Object.
Edit the weblink properties and add it to your report, note that we are passing the SR number as a parameter in the report, so we get details specific to this record only.
Add this weblink to the Layout assigned to your user role.
Step 3: View your changes
Create a new SR record or view an existing SR record that has all the required fields you need to successfully send out the email. You should see the email weblink that we created in Step 2 above
Click on the Weblink to launch the report. you will now see your neatly formatted email with all the required details.
Step 4: Add this in Outlook.
In your IE menu bar click File -> Send -> Page by E-mail...
The above step will create new email in Outlook with your formatted report.
I recently came across a requirement in which my client wanted to have some functionality in which, when a new SR is created, a Service Representative should be able to generate a neatly formatted email with all the required information and send it across to a Customer, so they know that the SR is being looked into, something like a SR Acknowledgment.
Here's what I did for them!
Solution:
Step 1: Build the Report
Create a Narrative Report that will contain all the required fields that is required to send out an email.
In Step 2 on the reports wizard add only a Narrative View
Save the report
Step 2: Create a Weblink and add to the Layout
Create a Weblink field in the Service Request Object.
Edit the weblink properties and add it to your report, note that we are passing the SR number as a parameter in the report, so we get details specific to this record only.
Add this weblink to the Layout assigned to your user role.
Step 3: View your changes
Create a new SR record or view an existing SR record that has all the required fields you need to successfully send out the email. You should see the email weblink that we created in Step 2 above
Click on the Weblink to launch the report. you will now see your neatly formatted email with all the required details.
Step 4: Add this in Outlook.
In your IE menu bar click File -> Send -> Page by E-mail...
The above step will create new email in Outlook with your formatted report.
And you're ready to go!
Cheers!
Monday, May 24, 2010
Generate pdf report with Images in CRM On Demand
Hi,
I had a requirement where the client had to display their company Image on pdf when the report was downloaded, the Image I was referencing was on their Company Portal. unfortunately the pdf file wouldn't pick this image, it worked only for HTML downloads.
Here is how you do it!
You can get Images from websites into your pdf file, but this will include two extra clicks...
Go to any report, click the “Printer Friendly” option, and select HTML.

An HTML webpage will be generated for that report, now in that web page in the Menu bar, go to File and select Print…
The below popup screen will be displayed, select “Adobe PDF” and click Print.
After you click Print you will have to save the Report, the save as type is automatically set to PDF, enter the Name .
And your pdf is generated will the Company logo.
Cheers!
I had a requirement where the client had to display their company Image on pdf when the report was downloaded, the Image I was referencing was on their Company Portal. unfortunately the pdf file wouldn't pick this image, it worked only for HTML downloads.
Here is how you do it!
You can get Images from websites into your pdf file, but this will include two extra clicks...
Go to any report, click the “Printer Friendly” option, and select HTML.

An HTML webpage will be generated for that report, now in that web page in the Menu bar, go to File and select Print…
The below popup screen will be displayed, select “Adobe PDF” and click Print.
After you click Print you will have to save the Report, the save as type is automatically set to PDF, enter the Name .
And your pdf is generated will the Company logo.
Cheers!
Friday, May 14, 2010
Repository Script Extractor for Siebel versions > 7.7
Hey folks,
Want to have a backup of all those cool and interesting scripts you wrote, but find it too taxing to manually copy each and every script in to a good readable format?
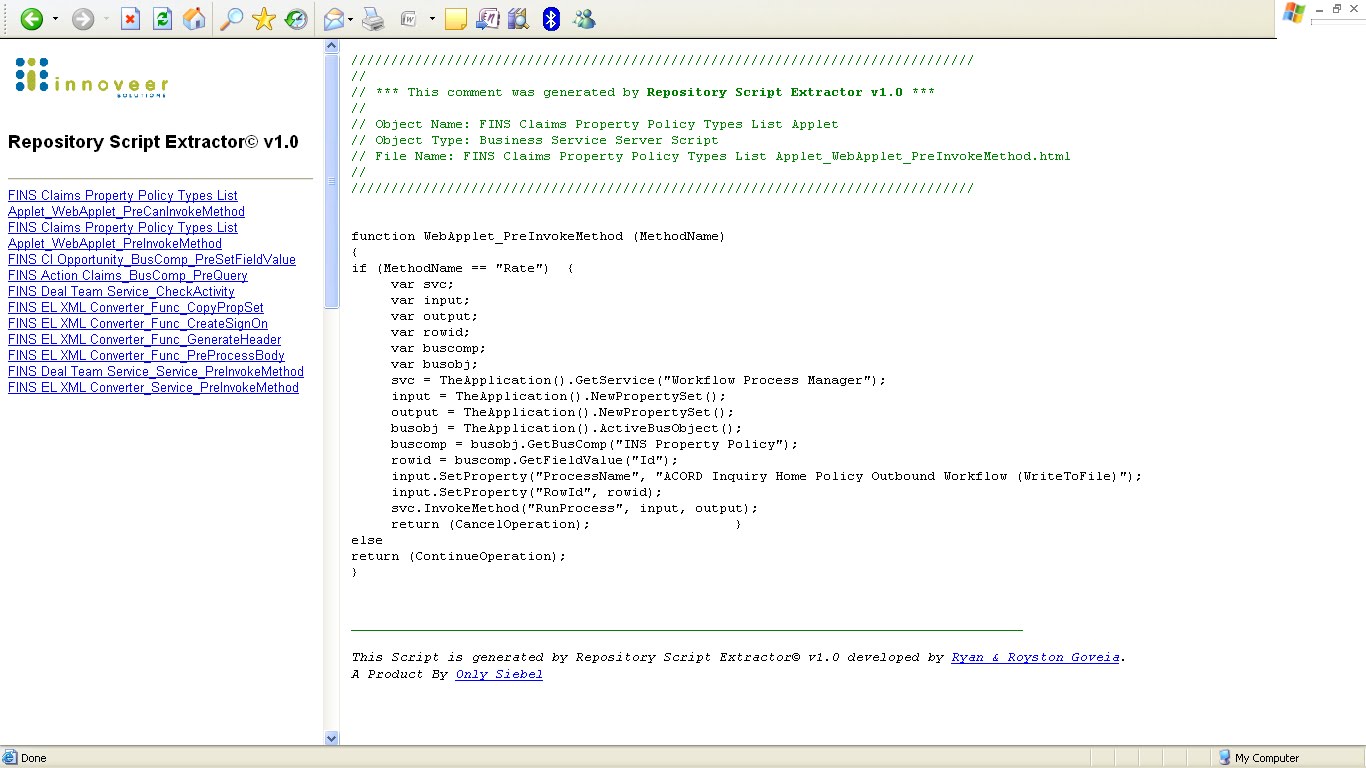
Here is a new tool the we have been working on. What it basically does is, it extracts the scripts based on a user given date or a prefix. Any scripts that were created or updated beyond the date will be exported into the excel sheet as well as in an HTML format just like the utility Oracle had introduced to extract scripts for versions 7.7 and earlier.
The tool connects to Siebel via the object layer and pulls out the information...
Here is a peak at what this tool looks like
Main UI
HTML Output
Click the below icon to download this cool tool..!
Cheers!
Want to have a backup of all those cool and interesting scripts you wrote, but find it too taxing to manually copy each and every script in to a good readable format?
Here is a new tool the we have been working on. What it basically does is, it extracts the scripts based on a user given date or a prefix. Any scripts that were created or updated beyond the date will be exported into the excel sheet as well as in an HTML format just like the utility Oracle had introduced to extract scripts for versions 7.7 and earlier.
The tool connects to Siebel via the object layer and pulls out the information...
Here is a peak at what this tool looks like
Main UI
HTML Output
Click the below icon to download this cool tool..!
Cheers!
Subscribe to:
Posts (Atom)